The Importance of Hiring Professional Painters

painterInsurance coverage is vital element in painting contract job just like guarantee. However commercial insurance and residential insurance differs in lots of ways. Still you should be sure that the painting contractor you select has got the proper qualifications to ensure that you are feeling guaranteed concerning the work done in your estate. A completely glued and insured painting company is a lot more prone to finish any project with quality results which too promptly.

Another step to bear in mind may be the commercial painters general business methods, including their company status and timely completing work with no delay. A very suggested commercial painting company might have a properly professional status and several well experienced painters.

Painting contractor’s expert painting abilities provides you with the very best remodeling service in commercial or residential sector. Additionally they give a free quote for that different service they provide. So if you feel to renovate your commercial or residential building obtain the the aid of the professional painting companies. They’ll examine your building structure and will show you the service needed for that building together with the price estimate and time needed.

However the entire process of choosing the correct painting contractors could be bit tough. You will find large amount of things to consider like experience, insurance, liability as well as their company status. But it may be easily solved by locating the local painting companies on the internet and request an estimate.

So while employing professional painting companies relaxation ensure that your estate is protected which the job is going to be completed in allocated some time and complete satisfaction. Thus it is extremely important, that you select an effective painting contractor with higher experience in working with both commercial and residential painting projects.

Selecting A Home Painting Contractor

The easiest method to look for a house painter who’ll execute a quality job and employ quality fresh paint would be to meet with a local fresh paint store and obtain references. Do your research and research fresh paint lines to find out the standard of fresh paint that you would like to make use of. For example, I’ll use PPG Porter Offers. PPG is really a leading manufacturer within the films industry and it has the best films and offers available. The merchandise line known as Silken Touch is available in all available sheens, includes a lifetime warranty, covers perfectly, touches up well and it is very washable. When choosing a home painter, I visit the local Porter Fresh paint store and speak with employees and obtain tips about who I ought to use. They provide me three different contacts for painting companies they would use in their own individual home making reccommendations which fresh paint to make use of, that we find the Silken Touch.

•  Request for recommendations – Most likely the best way to land a very qualified contractor is as simple as asking around for recommendations. Request your co-workers, buddies and relatives whether they can refer any painting contractor. Their tales and experience can help you gauge that will have the ability to provide the type of service that you would like accomplished for your house.

•  Compare quotes – If you have simplified lower your lists of prospective companies, you need to now check their cost. Compare the quotes with a minimum of 3 companies. They ought to roughly be of the identical range. If a person way too not the same as others, give them a call up and request what services are incorporated within the provided quote.

•  Speak to your candidates – Contact the candidates in your candidate and request them some questions – How lengthy are you currently in the industry? Are you currently licensed? Are you able to provide a listing of reference? What fresh paint items would you use? Do your employees get the job done or would you contract others to get it done? Using this method, you can aquire a wise decision what type of service they provide.

•  Look into the reference – Contact a minimum of three of the reference they provided. Request yesteryear clients regarding their experience and when they experienced any difficulty using the contractor. If at all possible, you need to go to the actual house so that you can personally the work’s quality.

•  Supply the specifics – Throughout your ending up in would-be companies, let them know the particulars from the project. Let them know what parts of the home you need to be colored, and if the painting continues outdoors of the home. This will help you to determine if the specifics you provided are incorporated within the package or if you want to pay extra.

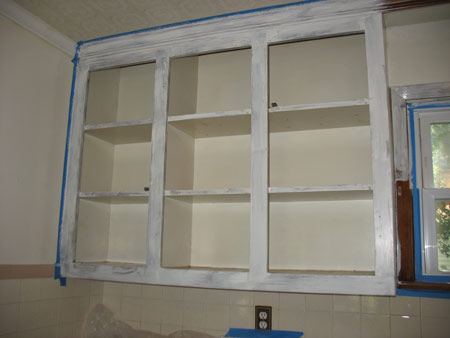
Painting your own property may look simple. However, you should be a specialist to determine the right shade, mix in addition to texture. You’d certainly not need an area which searching cheap simply because you colored it by yourself. Time you invest on painting the home alone is really valuable to discard. Make use of a painting contractor rather to accomplish the job for you personally.

Professional Painting Tips to Improve Your Paint Jobs

Painting is one of the most talked about projects of many homeowners. They get a kick out of the chance to do it themselves, both to save money and to have a fabulous time with a DIY project that the entire family can take part in and get a charge out of. Anyhow provided that you don’t utilize the right strategies and procedures, your home’s inside paint work can look progressively like a project that went wrong.

Here’s the manner by which to make your DIY paint work look as professional as could be allowed:

1. Tape the edges of the floor.

The speediest and most straightforward route for paint work to look unprofessional is to have paint drippings and splotches on the floor around the dividers, particularly when its so simple to dodge these sorts of spills and mishaps. Always lay plastic or a blanket on the floor before beginning and tape the edges down. Likewise, utilization painter’s tape around the edge of the floor to keep from spilling on the embellishment or the floor when you get down to the lowest part of the divider.

2. Always use primer.

A ton of individuals will do without utilizing primer assuming that they’re painting with a light color, yet primer has more than one capacity. An exceptional layer of primer will hold paint on your walls longer, and it will help make the paint colors and layers even across all surfaces.

3. Utilize an Extension Roller and Always Roll From Top to Bottom.

This is key in determining your walls aren’t left with streaks or abnormal paint lines. Apply more force to the unsupported side of the paint roller, and keep that side tilted marginally to the left. This trick will likewise help dodge roller tracks.

4. Pick the Right Tools.

Paint trays and small rollers are for real amatures. To make your paint work appear as though it was took care of by a pro, pick rather a substantial (5 gallon or more) pail and a metal basin grid. The grip snaps onto the pail and permits you to effectively roll paint onto your roller, without getting excess and serves to avoid spills that happen effortlessly when your paint tray is on the floor.

5. Paint on less humid days.

Calco Painting, of Denver Colorado. say paint dries much quicker in dry climates, while days when there is a mess of dampness circulating everywhere alters drying times. Save yourself the migraine and attempt to paint when the climate is dry so you can rapidly paint a couple of covers without needing to hold up so long between provisions.

6. Wrap doorknobs with plastic.
Assuming that you’ve ever tried to rub paint off doorknobs and handles, you know it isn’t a simple work. Avoid this by utilizing plastic sandwich packs to blanket your entryway handles, and utilization painter’s tape to secure the edges.

Tips for Exterior Painting

Exterior painting is the best way to protect one of the largest investments you’ve made in your life, your home. In addition to thorough prep work, there are also important application procedure that you should follow to give you the long lasting results you desire.

The first step in preparing for exterior Denver painting is to pressure wash your house using a diluted bleach to remove flaking paint, dirt, algae and mildew. After washing the home, scrape any loose paint off with a metal brush. Sand any wood to prepare it for the primer coat. When you work with a pressure washer make sure to wear eye protection and work from the top down.

If mildew still exists after cleaning with the pressure washer you should spot clean the areas with a bleach mixture and a rag. Mildew is especially attracted to oil-based paints. If you have a major mildew problem, you can add more mildewcide to your paint. Be careful when adding mildewcide to your paint because it can cause the paint to fade when exposed to light.

Painters in Denver say, your exterior painting job will be seriously improved by properly caulking the area. When caulking trim to siding, the strength of the joint can be improved by spreading the caulk with your hands. Adhesion is seriously improved by using this installation method. When caulking a brick surface make sure to use a slimmer bead of caulk and don’t spread it manually. Continue reading Tips for Exterior Painting

Painting Designs on a Mirror

Painting glass; be it a mirror, pilsner glass or mug can be a fun project. You can put your personal touch on an otherwise boring piece of glassware. Painting glass can also be a project you use to tie the rest of your decor together without spending a lot of money. The following article will show you how to properly paint designs on any glass surface as well as how to protect it.

Step 1 – Drawing the Design

It is important to draw the design so you have a guide to work off of. Take a look at the piece of glass you are planning to work on. Hold your paper up to it and trace the outline of the object to it. If you are working with an object that is round, like a pilsner glass, it is a good idea to place the paper inside it. Use a piece of tape to connect the paper where it meets. Now you will be able to on your design with your shape in mind. A mirror requires the use of transfer or carbon paper.

Step 2 – Transferring the Design

Now that you have your design ready you can move to the glass to make painting easier to do. With a flat object you can merely set it on top of the design. If you are painting a mirror you must use the transfer or carbon paper according to the directions. The rounded object is a little more of a hassle and will involve putting the design inside of it. Once the design is seen through (or transferred to) you can place it on the glass. Use the black marker to trace the lines on the glass. When you are done allow it to dry and go over the lines again. The goal is to get a streakless design outline.

Read more: http://www.doityourself.com/stry/how-to-paint-designs-on-a-mirror#b#ixzz2WVcvnzBm

Painting Your Kitchen Cabinets

If you are moving in to a new home or trying to create a new feel in your house, the kitchen is a great way to start. Dated designs can really affect the appeal of your home. If your kitchen is dark and unenthusiastic, Denver painters say a coat of paint can transform it into a space where you will love to spend time.

Prep Your Kitchen

Before beginning a kitchen fresh paint job, empty the cupboards, obvious from the counters, and take away free standing home appliances. Relocate tables along with other furniture to a different room. Tape rosin paper within the counter tops and flooring, and tape plastic sheets within the backsplash, home windows, fixed home appliances, and interior entrance doors (to safeguard the relaxation of the home from dust and fumes). Mask off the beaten track round the cabinets. Finally, generate a worktable for painting doorways, drawers, and shelves. Out the hinge screws in the cabinet frame and take away the doorways. Working systematically from left to right, head to feet, label each with a designated bit of tape. Also, number the finishes of cabinet shelves and also the bottoms of drawers. Put aside the shelf-hanging hardware. At the worktable, take away the pulls and hinges and save what’s being used again. Around the doorways, transfer the amount in the tape towards the uncovered wood under one hinge. Pay for it with fresh tape.

Clean

Open the home windows for ventilation and set on safety gear. Scrub lower all the face frames, doorways, drawer fronts, and shelving by having an abrasive pad drizzled with liquid deglosser. Hold a rag underneath to trap drainage. Prior to the deglosser disappears, rapidly remove the residue with another clean, deglosser-wet rag.
priming
Prime

Some use spray paint to prime kitchen cabinets. Slow-drying out, oil-based primers work fine on tight-grained forest like walnut or cherry, or on guy-made materials. However they just permeate open-grained forest for example mahogany or hickory. Brushing putty, the pudding-thick, oil-based coating primes the wood. A few caveats: It ought to be applied with a decent-quality nylon material-polyester brush, which you will need to discard after each coat. Also it does not become level because it dries assiduous sanding is needed to flatten it.

Beginning towards the top of your cabinet, brush around the primer or brushing putty over the grain, then “tip off”-pass the comb gently within the wet finish in direction of the grain. Always tip off in one stroke in one finish to another. Provide each day to dry. (If using brushing putty, use a second coat the following day and wait a later date for this to dry.) Sand the flat surfaces having a random-orbit sanding machine. Sand any profiled surfaces having a medium-grit sanding sponge. When you are done, everything ought to be glass-smooth.

Professional tip: Stick to the underlying structure from the cabinet or door using the brush. In which a rail (horizontal piece) butts right into a stile (vertical piece), for example, fresh paint the rail first, overlapping slightly to the stile. Then, prior to the overlap dries, fresh paint the stile. In which a stile butts right into a rail, fresh paint the stile first. Squeeze a skinny bead of latex caulk into any open seams. Pull the end along the way, and then smooth the caulk having a moist finger. Fill small dents and dings with vinyl spackle. Once dry, within an hour, sand again and then clean the surface of any and all debris. Place-prime the spackle, and then any spots in which the blown-on primer is “burned through,” with a spray can of fast-drying out oil-based primer. Wait an hour or so, and then sand the primer gently with 280-grit paper. Vacuum all surfaces, and wipe having a tack cloth.

Work all the way through, using the fresh paint over the grain, then tipping them back using the grain. For cabinet inside, use the fresh paint having a smooth-surface small curler, which leaves a small orange-peel texture. Sand all surfaces with 280-grit paper, then vacuum and clean with tack cloth. Use a new brush on the final coat.  Once the final coat is dry, switch the shelf wardrobe hangers.

Paint the Doors

The process for preparing and painting doorways, drawers, and shelves is equivalent to around the cabinets, with the exception that everything is performed on the table to lessen the risk of drainage, runs, and sags. Paneled doorways pose some kind of special challenges here’s Dee’s approach.

Stick to the same prep sequence for cabinets-clean with deglosser, fill the holes, sand, vac, and tack-and also the same priming sequence: within this situation, two jackets of brushing putty. Smooth the flat surfaces around the panel and also the frame having a random-orbit sander. On bevels or profiles, apply hard work along with a medium-grit sanding sponge. Spackle and sand any dents.painted ccabinets

Dry Time

Painting cabinet doorways is really a trade-off between perfection and speed. John Dee, a perfectionist, favors to complete one for reds at any given time, keeping faces flat so that they do not get runs. But that is 48 hrs of drying out time per door-eventually per side. Here’s his way of painting each side per day.

Twist two screw hooks into holes drilled within an off traffic door edge (the low edge for bottom cabinets, top of the edge to find the best cabinets). Fresh paint the door’s outdoors face as above. Allow it to dry to have an hour while resting flat, then tilt the doorway up onto its hooks and set a drywall screw into a current hardware hole. Contain the moved door up through the screw and fresh paint the door’s back side.

When you are done painting, get the doorway through the screw and something hook and hang up both hooks on the sturdy wire clothes hanger. Suspend from the shower curtain fishing rod or clothes fishing rod before the door is dry.

Reassemble the Cabinets

Wait for a final coat to dry, and then put back the shelves. Take away the tape over each door’s number, install the hinges and knob, then hang it within the opening it originated from. Switch the drawer pulls (or even better, add brand new ones) and re-install each drawer in the original opening.

How to Best Paint a Fence

If you maintain your fence it will last for years. Fences add a great aesthetic element to your outdoor space, and give you and your family more privacy.  If your fence is in need of some care, take time to paint or stain it. Painting or staining the wood will help preserve it and boost your curb appeal. Denver painters say, painting your fence in the spring or fall is best because it is not too hot or too cold to be in the elements for a long period of time. Make sure you are prepared before starting your painting project. You’ll need a broom, scraper or wire brush, a cloth, a 5 inch paint brush, 1 inch paint brush and a enough outdoor paint to cover the area.  

After you have gathered all the necessary supplies, you’ll need to prep the work space. Clear any leaves, grass and weeds from the base of the fence with a rake and hand tools. You can place a cover or drop cloth over plants and objects you don’t want to drip paint onto. Next begin cleaning and and sanding the fence so you can apply a solid even coat. scrap off any peeling paint and sand uneven areas smooth before applying any paint. If you find mildew or bleach on your fence, dab the areas with a diluted bleach mixture. Also replace any damaged or insect infested fence panels.  Continue reading How to Best Paint a Fence

Tips on Painting Furniture

We painted our kitchen cabinets as part of our recent kitchen makeover (which you can see more of here).  Going in, I, like many earnest DIYers of the past, had high hopes of turning our cabinets into sparkly white wonders within a single weekend.  Turns out, it takes a lot longer than that.  In fact, it took us 5 weekends.  You could probably cut out at least one of those if you used an orbital sander and probably another on top of that if you are using a paint sprayer.  But we’re hardcore and sanded and painted everything by hand.  Yippee!  But enough about that, you’re here to learn how to paint your own kitchen cabinets and that’s just what I’m going to show you!  Ready?

created at: 03/13/2012

created at: 03/13/2012

created at: 03/13/2012

Materials!  My favorite.  Before you get started, you’re going to need to do a little shopping and gather up the following items:

  1. Paint – Oil based OR 100% acrylic latex, semi-gloss or gloss. We went with acrylic latex, semi-gloss.
  2. Primer – Don’t skip this! If you can, try to use a primer labeled “high build” or “sandable”.
  3. Degreaser or TSP
  4. An angled brush OR rent/buy a paint sprayer. Using a sprayer will probably save you about one (of our five) weekends.
  5. Sandpaper – You’re going to need 100 grit (medium) and 220 grit (extra fine/fine).
  6. Sponge (to use with your degreaser/TSP)
  7. Gloves (to use with your degreaser/TSP)
  8. Tack Cloth

Other items you will need: rosin paper OR plastic sheeting to protect your counters, painters pyramids OR 2x4s with nails hammered through (to set yourcabinet doors on while drying), and a shop vacuum.  And that’s it.  Let’s start painting!

created at: 03/13/2012

created at: 03/13/2012

Step 1: Remove cabinet doors and drawer fronts, plus any hardware that might be attached.  (If you’re protecting your countertops, now’s the time to cover them with your rosin paper/plastic sheeting.)

Step 2: Take your degreaser/TSP and thoroughly clean all areas of your cabinet doors/drawer fronts as well as the cabinet boxes.  If you have sensitive skin (or don’t want chemicals all over your hands) wear gloves!

created at: 03/13/2012

Step 3: If your cabinets have dings or you’re replacing your hardware with something different, fill in all the holes/divots with wood putty.  (We didn’t have this issue.)  Next, sand your cabinets and cabinet boxes with 100 grit sandpaper, going with the grain.  Really get in there and rough up that surface.

Step 4: Vacuum up as much sawdust as you can.

created at: 03/13/2012

Step 5: Using your tack cloth, wipe off any remaining sawdust.  You want your surface to be as clean and dust-free as possible.  Taking the time to adequately prep is KEY.

Step 6: Prime time!  Apply your primer, starting with the inner panel.  Go against the grain first, then with it.  This will help to fill in the grain and create a smoother surface.  Allow the primer to dry thoroughly; consider priming your cabinet boxes while you wait.

Read full article here

Painting Your Ceiling

Painters, whether professional or amateur, dislike painting ceilings. Painters in Denver say,  ceiling painting is untidy and difficult in your arms, legs, and back. Not just that, but when you’re simply re-painting your ceiling flat whitened, the payback its the work is minimal!

So in the event you jump on a ladder and roll the ceiling? Build scaffold? Make use of a curler extension? Spray it?

Scaffold? Dream On…painting a ceiling

Scaffold will be the best choice, except when you developed a room’s price of scaffold (or moved around a more compact part of scaffold to follow along with your painting), you’d currently have been done using a curler extension pole.

Drips Happen – Get ready for Them

Just try painting a ceiling without creating drips. The most fastidious professional can create drainage when painting roofs. Yes, you are able to manage without drop towels (if you would like) for walls along with other vertical areas, however this doesn’t seem possible related to roofs. Continue reading Painting Your Ceiling

Tips for Painting With Spray Paint

Spray paint isn’t just for street art and graffiti. Spray paint is a great tool for both interior and exterior painting projects. Using spray paint is really fun especially if you are more of an instant gratification type of person. Spray paint can deliver professional looking results without having to bother with the drips and slips of a paint brush. Spray paint is by far the most time efficient method of applying paint to any surface. 

  1. Choose your location. A well-ventilated location will protect you from paint fumes. Outdoors is best, but an open garage is a good second choice. Otherwise, open as many windows as possible and use a fan while spraying and drying. Also make sure to protect objects around you from over-spray. Put down drop cloths and tape where needed.
  2. Prep the surface you are going to spray. The best results are achieved when you take time to clean and sand before applying paint.  Priming the surface is another great way to ensure a long lasting even finish.
  3. Check your paint for any special instructions on preparation, ventilation or after care.
  4. Always test the paint on another object before spraying it on your project. If you are painting metal, spray it on a piece of scrap metal and if it is a wood project, spray it on wood. This will test for any defects and also give you a chance to see the true color before finishing your project.
  5. A spray paint gun is a great investment if you are an avid spray painter. Rustoleum makes a great spray paint gun. Buying a gun is a great way to get a more even coat and keep your finger from getting too tired. Some spray paint guns only work with fat nozzled spray paint, so make sure to read the instructions before purchasing your paint.  Continue reading Tips for Painting With Spray Paint

Painting Brick Exteriors

If you new home is made of dull looking brick, or you have a old home that needs a new look painting the brick is a great solution. Denver painters say, painting brick is different than other painting projects, but with proper preparation you can successfully paint your brick home. Painting the exterior of your brink home is a big decision that shouldn’t be taken lightly. The paint will need regular care and maintenance for upkeep.

The sixty four brick flickr page!  Please leav...
(Photo credit: robpatrick)

The most important part of successfully painting bricks is to thoroughly clean them before  you begin painting. To clean the brick’s surface spray it with a hose or use a pressure washer. The pressure washer should have a setting of 1500 PSI. If there are white stains on the brick, scrub them off with a stiff bristle brush. White stains are indications of efflorescence and salt deposits. Efflorescence occurs when the brick releases water from its pores. If mildew is a problem use the stiff bristle brush to scrub a diluted bleach solution on the affected bricks.

Repair any cracks in the brick before painting. You can use acrylic caulk to fill any holes you find in the brick, but remember to allow ample drying time for any of these areas. Even the best painter will drip and spill some paint while working on a project. To guard your windows, doors and plants from any spills cover them in newspaper and tarps. Start by painting on a latex primer with a paint brush or paint sprayer. You’ll need to apply a couple coats to areas where you cleaned off efflorescence or mildew. Once you finish applying the primer and letting it dry, you are ready to paint!  Continue reading Painting Brick Exteriors